![[Selenium Java] Bài 12: Xử lý hành động với Actions class Robot class](/uploads/banner/blog-category/selenium-java/selenium-java-bai-12.jpg)
Nội dung bài học
A. Actions Class
Actions class là một thư viện được cung cấp bởi Selenium để xử lý các sự kiện bàn phím và chuột. Trong Selenium WebDriver, việc xử lý các sự kiện này bao gồm các thao tác như kéo và thả, nhấp vào nhiều phần tử bằng phím điều khiển, trong số các thao tác khác. Các hoạt động này được thực hiện bằng API tương tác người dùng nâng cao. Nó chủ yếu bao gồm các Hành động cần thiết khi thực hiện các hoạt động này.
Bước 1: Đầu tiên, để dùng được thư viện Actions class chúng ta import thư viện vào:
import org.openqa.selenium.interactions.ActionsBước 2: Để sử dụng các phương thức được cung cấp bởi lớp Actions, chúng ta cần tạo một đối tượng của lớp này và chuyển WebDriver làm đối số:
// instantiate the WebDriver
WebDriver driver = new ChromeDriver();

// create an object of the Actions class
Actions action = new Actions(driver);
Bước 3: Đối tượng được tạo bây giờ có thể được sử dụng để thực hiện bất kỳ hành động nào. Bạn có thể thấy các hành động khác nhau được cung cấp bởi lớp này sau khi bạn tạo một đối tượng.![[Selenium Java] Lesson 12: Xử lý User Interactions dùng Actions class Robot class | Anh Tester](/uploads/lesson/selenium_java/actions-robot-class/implement-the-actions-class.png)
Các Phương thức của lớp hành động
Lớp hành động hữu ích chủ yếu cho các hành động chuột và bàn phím. Để thực hiện các hành động như vậy, Selenium cung cấp nhiều phương thức khác nhau.
Các thao tác chuột trong Selenium:
- doubleClick () : Thực hiện nhấp đúp vào phần tử
- clickAndHold () : Thực hiện nhấp lâu vào chuột mà không nhả nó
- dragAndDrop () : Kéo phần tử từ một điểm và thả xuống một điểm khác
- moveToElement () : Di chuyển con trỏ chuột đến giữa phần tử
- moToElementBy() : Một phương thức thực hiện nhấp và giữ tại vị trí của phần tử nguồn, di chuyển theo một độ lệch đã cho, sau đó nhả chuột.
- moveByOffset(): Di chuyển chuột từ vị trí hiện tại của nó (hoặc 0,0) theo độ lệch đã cho.
- release() : Thả nút chuột trái ở vị trí chuột hiện tại
- contextClick () : Thực hiện nhấp chuột phải vào chuột
Thao tác bàn phím trong Selenium:
- sendKeys () : Gửi một loạt khóa đến phần tử
- keyUp () : Thực hiện phát hành khóa
- keyDown () : Thực hiện nhấn phím mà không cần nhả
- Các lệnh bàn phím khác...(ENTER, SHIFT, CTRL, TAB,...)
build()trong lớp Actions được sử dụng để tạo chuỗi hành động hoặc thao tác mà bạn muốn thực hiện.perform()Phương thức này trong Lớp Hành động được sử dụng để thực hiện chuỗi hành động được xây dựng bằng cách sử dụng Phương pháp xây dựng Hành động.build().perform()= tạo chuỗi hành động + thực thi
Bây giờ, chúng ta hãy tìm hiểu cách thực hiện các thao tác chuột và bàn phím khác nhau.
1. sendKeys + click + Keys class (using Keyboard)
Sử dụng lớp Actions trong Selenium, chúng ta có thể triển khai phương thức sendKeys () để nhập các giá trị cụ thể trong ứng dụng.
package AnhTester.ActionsClass;

import org.openqa.selenium.By;
import org.openqa.selenium.WebDriver;
import org.openqa.selenium.WebElement;
import org.openqa.selenium.chrome.ChromeDriver;
import org.openqa.selenium.interactions.Actions;

public class sendKeys {

	public static void main(String[] args) throws InterruptedException {

		// specify the driver location
		System.setProperty("webdriver.chrome.driver", "resources/chromedriver/chromedriver.exe");

		// instantiate the driver
		WebDriver driver = new ChromeDriver();

		// maximise the window
		driver.manage().window().maximize();

		// specify the URL of the webpage
		driver.get("https://www.google.com/");

		// specify the locator of the search box
		WebElement element = driver.findElement(
				By.xpath("/html[1]/body[1]/div[1]/div[3]/form[1]/div[1]/div[1]/div[1]/div[1]/div[2]/input[1]"));

		// create an object for the Actions class and pass the driver argument
		Actions action = new Actions(driver);

		// pass the product name that has to be searched in the website
		action.sendKeys(element, "Anh Tester").build().perform();

		Thread.sleep(2000);
		driver.quit();
	}
}
Trong phần này, chúng ta sẽ xem cách chúng ta có thể sử dụng lớp Hành động trong Selenium để gửi các Khóa khác như CTRL, ALT, SHIFT, v.v.
Khi chúng ta đang tìm kiếm một từ khóa trên trang web Google, chúng tôi sẽ nhập 'Anh Tester' và nhấn Enter từ bàn phím. Hành động này sẽ giống như hành động được thực hiện bằng cách nhấp vào nút Tìm kiếm.
package AnhTester.ActionsClass;

import org.openqa.selenium.By;
import org.openqa.selenium.Keys;
import org.openqa.selenium.WebDriver;
import org.openqa.selenium.WebElement;
import org.openqa.selenium.chrome.ChromeDriver;
import org.openqa.selenium.interactions.Actions;

public class keyboard_Keys {

	public static void main(String[] args) throws InterruptedException {

		// specify the driver location
		System.setProperty("webdriver.chrome.driver", "resources/chromedriver/chromedriver.exe");

		// instantiate the driver
		WebDriver driver = new ChromeDriver();

		// maximise the window
		driver.manage().window().maximize();

		// specify the URL of the webpage
		driver.get("https://www.google.com/");

		// specify the locator of the search box
		WebElement element = driver.findElement(
				By.xpath("/html[1]/body[1]/div[1]/div[3]/form[1]/div[1]/div[1]/div[1]/div[1]/div[2]/input[1]"));

		// create an object for the Actions class and pass the driver argument
		Actions action = new Actions(driver);

		// pass the product name that has to be searched in the website
		action.sendKeys(element, "Anh Tester").build().perform();

		action.sendKeys(Keys.ENTER).build().perform();

		Thread.sleep(2000);
		driver.quit();
	}
}
và cuối cùng là thêm lệnh click() vào thôi:
package AnhTester.ActionsClass;

import org.openqa.selenium.By;
import org.openqa.selenium.Keys;
import org.openqa.selenium.WebDriver;
import org.openqa.selenium.WebElement;
import org.openqa.selenium.chrome.ChromeDriver;
import org.openqa.selenium.interactions.Actions;

public class click {

	public static void main(String[] args) throws InterruptedException {

		// specify the driver location
		System.setProperty("webdriver.chrome.driver", "resources/chromedriver/chromedriver.exe");

		// instantiate the driver
		WebDriver driver = new ChromeDriver();

		// maximise the window
		driver.manage().window().maximize();

		// specify the URL of the webpage
		driver.get("https://www.google.com/");

		// specify the locator of the search box
		WebElement element = driver.findElement(
				By.xpath("/html[1]/body[1]/div[1]/div[3]/form[1]/div[1]/div[1]/div[1]/div[1]/div[2]/input[1]"));

		// create an object for the Actions class and pass the driver argument
		Actions action = new Actions(driver);

		// pass the product name that has to be searched in the website
		action.sendKeys(element, "Anh Tester").build().perform();

		action.sendKeys(Keys.ENTER).build().perform();

		// Get element title of page
		WebElement elementTitlePage = driver
				.findElement(By.xpath("//h3[normalize-space()='Anh Tester - Automation Testing']"));

		// perform a mouse click on the search button
		action.click(elementTitlePage).build().perform();

		Thread.sleep(2000);
		driver.quit();
	}
}
2. contextClick và doubleClick
Hàm contextClick() để click chuột phải
Hàm doubleClick() y như cái tên nó, click nhanh 2 lần vào phần tử nào đó
Đầu tiên double click vào Title page
package AnhTester.ActionsClass;

import org.openqa.selenium.By;
import org.openqa.selenium.Keys;
import org.openqa.selenium.WebDriver;
import org.openqa.selenium.WebElement;
import org.openqa.selenium.chrome.ChromeDriver;
import org.openqa.selenium.interactions.Actions;

public class contextClick_doubleClick {

	public static void main(String[] args) throws InterruptedException {

		System.setProperty("webdriver.chrome.driver", "resources/chromedriver/chromedriver.exe");
		WebDriver driver = new ChromeDriver();
		driver.manage().window().maximize();
		driver.get("https://anhtester.com/");

		WebElement element = driver.findElement(
				By.xpath("//div[@class='col-lg-7']//h2[@class='section__title'][contains(text(),'Anh Tester')]"));

		Actions action = new Actions(driver);

		action.doubleClick(element).build().perform();

		Thread.sleep(2000);
		driver.quit();
	}
}
Tới click chuột phải nào
package AnhTester.ActionsClass;

import org.openqa.selenium.By;
import org.openqa.selenium.Keys;
import org.openqa.selenium.WebDriver;
import org.openqa.selenium.WebElement;
import org.openqa.selenium.chrome.ChromeDriver;
import org.openqa.selenium.interactions.Actions;

public class contextClick_doubleClick {

	public static void main(String[] args) throws InterruptedException {

		System.setProperty("webdriver.chrome.driver", "resources/chromedriver/chromedriver.exe");
		WebDriver driver = new ChromeDriver();
		driver.manage().window().maximize();
		driver.get("https://anhtester.com/");

		WebElement element = driver.findElement(
				By.xpath("//div[@class='col-lg-7']//h2[@class='section__title'][contains(text(),'Anh Tester')]"));

		Actions action = new Actions(driver);

		//Double click to element
		action.doubleClick(element).build().perform();

		Thread.sleep(1000);

		//Right click to element
		action.contextClick(element).build().perform();

		Thread.sleep(2000);
		driver.quit();
	}
}
3. moveToElement
Di chuyển đến phần tử nào đó
package AnhTester.ActionsClass;

import org.openqa.selenium.By;
import org.openqa.selenium.Keys;
import org.openqa.selenium.WebDriver;
import org.openqa.selenium.WebElement;
import org.openqa.selenium.chrome.ChromeDriver;
import org.openqa.selenium.interactions.Actions;

public class moveToElement {

	public static void main(String[] args) throws InterruptedException {

		System.setProperty("webdriver.chrome.driver", "resources/chromedriver/chromedriver.exe");
		WebDriver driver = new ChromeDriver();
		driver.manage().window().maximize();
		driver.get("https://anhtester.com/");

		WebElement element = driver.findElement(
				By.xpath("//h2[contains(text(),'Kiến thức Automation Testing')]"));

		Actions action = new Actions(driver);

		//Move to element (di chuyển tới title Kiến thức Automation Testing)
		action.moveToElement(element).build().perform();

		Thread.sleep(2000);
		driver.quit();
	}
}
4. dragAndDrop
Phương thức dragAndDrop (nguồn WebElement, mục tiêu WebElement) được sử dụng để kéo một phần tử từ nguồn và thả nó vào vị trí đích.![[Selenium Java] Bài 12: Xử lý hành động với Actions class Robot class | Anh Tester](/uploads/lesson/selenium_java/actions-robot-class/drag-drop-examples.jpg)
Có hai cách để thực hiện việc này với sự trợ giúp của lớp Hành động trong Selenium
- Sử dụng phương thức dragAndDrop (nguồn WebElement, mục tiêu WebElement).
- Sử dụng loạt hành động thủ công: clickAndHold (nguồn WebElement)? moveToElement (mục tiêu WebElement)? release()
Đây là demo cách An kéo thả element sử dụng hàm dragAndDrop của Action class
@Test
public void demoDragAndDropWithActionClass() {
  driver.get("http://www.dhtmlgoodies.com/scripts/drag-drop-custom/demo-drag-drop-3.html");
  sleep(1);

  // Bắt element cần kéo
  WebElement From = driver.findElement(By.xpath("//div[@id='box6']"));
  // Bắt element cần thả đến
  WebElement To = driver.findElement(By.xpath("//div[@id='countries']//div[1]"));

  sleep(1);
  Actions action = new Actions(driver);
  // Kéo và thả
  action.dragAndDrop(From, To).build().perform();

  sleep(2);
}
Một ví dụ khác dùng Robot class:
public boolean dragAndDropHTML5(WebElement fromElement, WebElement toElement) {
  try {
    Robot robot = new Robot();
    robot.mouseMove(0, 0);

    int X1 = fromElement.getLocation().getX() + (fromElement.getSize().getWidth() / 2);
    int Y1 = fromElement.getLocation().getY() + (fromElement.getSize().getHeight() / 2);
    System.out.println(X1 + " , " + Y1);

    int X2 = toElement.getLocation().getX() + (toElement.getSize().getWidth() / 2);
    int Y2 = toElement.getLocation().getY() + (toElement.getSize().getHeight() / 2);
    System.out.println(X2 + " , " + Y2);

    //Chổ này lấy toạ độ hiện tại cộng thêm 120px là phần header của browser (1920x1080 current window)
    //Header: chrome is being controlled by automated test software
    sleep(1);
    robot.mouseMove(X1, Y1 + 190); //Tuỳ độ phân giải của màn hình
    robot.mousePress(InputEvent.BUTTON1_DOWN_MASK);

    sleep(1);
    robot.mouseMove(X2, Y2 + 150);
    sleep(1);
    robot.mouseRelease(InputEvent.BUTTON1_DOWN_MASK);

    return true;
  } catch (Exception e) {
    System.out.println(e.getMessage());
    return false;
  }
}

@Test
public void demoDragAndDropHTML5() {
  driver.get("https://ui.vision/demo/webtest/dragdrop/");
  sleep(2);

  // Bắt element cần kéo
  WebElement From = driver.findElement(By.xpath("//a[@id='one']"));
  // Bắt element cần thả đến
  WebElement To = driver.findElement(By.xpath("//div[@id='bin']"));

  sleep(1);
  //Gọi lại hàm dragAndDropHTML5 đã xây dựng riêng
  dragAndDropHTML5(From, To);

  sleep(2);
}
5. KeyUp và KeyDown
Phương thức keyUp và keyDown được sử dụng để bắt chước các thao tác nhấn và thả phím trên bàn phím. Các phương thức này phục vụ nhiều phương thức như chuyển đổi văn bản thành chữ hoa hoặc chữ thường, sao chép văn bản từ nguồn và dán vào vị trí đích, cuộn lên và xuống trang web, lựa chọn nhiều giá trị, v.v.
a. Chuyển văn bản sang chữ hoa
Khi muốn nhập văn bản theo cách thủ công, chúng ta nhấn phím SHIFT xuống và nhập văn bản đồng thời mà không cần nhả phím SHIFT. Chúng ta có thể áp dụng logic tương tự cho mã của mình như dưới đây
package AnhTester.ActionsClass;

import java.util.concurrent.TimeUnit;

import org.openqa.selenium.By;
import org.openqa.selenium.Keys;
import org.openqa.selenium.WebDriver;
import org.openqa.selenium.WebElement;
import org.openqa.selenium.chrome.ChromeDriver;
import org.openqa.selenium.interactions.Actions;
import org.testng.annotations.Test;

public class KeyUp_KeyDown {

	@Test
	public void InputTextUppercase() throws InterruptedException {
		System.setProperty("webdriver.chrome.driver", "resources/chromedriver/chromedriver.exe");
		WebDriver driver = new ChromeDriver();
		driver.manage().timeouts().pageLoadTimeout(10, TimeUnit.SECONDS);
		driver.manage().window().maximize();
		driver.get("https://www.google.com/");

		WebElement element = driver.findElement(
				By.xpath("/html[1]/body[1]/div[1]/div[3]/form[1]/div[1]/div[1]/div[1]/div[1]/div[2]/input[1]"));

		Actions action = new Actions(driver);

		// Đè giữ phím SHIFT và nhập text -> Chữ in hoa
		action.keyDown(element, Keys.SHIFT).sendKeys("anh tester").build().perform();

		Thread.sleep(2000);
		driver.quit();
	}
}
b. Cuộn lên và xuống trang
Bạn cũng có thể cuộn lên đầu hoặc cuối trang bằng thao tác đè CONTROL + HOME hoặc CONTROL + END
Chúng ta chuyển qua cách viết TestNG nhé =))
	@Test
	public void ScrollPage() throws InterruptedException {
		System.setProperty("webdriver.chrome.driver", "resources/chromedriver/chromedriver.exe");
		WebDriver driver = new ChromeDriver();
		driver.manage().timeouts().pageLoadTimeout(10, TimeUnit.SECONDS);
		driver.manage().window().maximize();
		driver.get("https://anhtester.com/");

		Actions action = new Actions(driver);

		Thread.sleep(1000);
		// Scroll down
		action.keyDown(Keys.CONTROL).sendKeys(Keys.END).perform();
		Thread.sleep(2000);
		// Scroll up
		action.keyDown(Keys.CONTROL).sendKeys(Keys.HOME).perform();

		Thread.sleep(2000);
		driver.quit();
	}
c. Copy & Paste
@Test
	public void CopyAndPaste() throws InterruptedException {
		System.setProperty("webdriver.chrome.driver", "resources/chromedriver/chromedriver.exe");
		WebDriver driver = new ChromeDriver();
		driver.manage().timeouts().pageLoadTimeout(10, TimeUnit.SECONDS);
		driver.manage().window().maximize();
		driver.get("https://anhtester.com/blogs");

		WebElement inputCourseElement = driver.findElement(By.xpath("//input[@placeholder='Search for courses . . .']"));
		WebElement inputBlogElement = driver.findElement(By.xpath("//input[@placeholder='Search blogs here...']"));

		Actions action = new Actions(driver);

		Thread.sleep(1000);
		// Nhập text vào ô search course
		inputCourseElement.sendKeys("testing");
		Thread.sleep(1000);
		//Ctrl + a để bôi đen
		action.keyDown( Keys.CONTROL ).sendKeys( "a" ).keyUp( Keys.CONTROL ).build().perform();
		Thread.sleep(1000);
		//Ctrl + c để copy
		action.keyDown( Keys.CONTROL ).sendKeys( "c" ).keyUp( Keys.CONTROL ).build().perform();
		Thread.sleep(1000);
		//click vào ô Blog search
		inputBlogElement.click();
		Thread.sleep(1000);
		//Ctrl + v để dán
		action.keyDown( Keys.CONTROL ).sendKeys( "v" ).keyUp( Keys.CONTROL ).build().perform();

		Thread.sleep(2000);
		driver.quit();
	}
d. Làm mới trang
Dễ mà, nhấn Ctrl + F5 =))
action.keyDown(Keys.CONTROL).sendKeys(Keys.F5).build().perform();
==> Kết thúc Actions Class !!!
B. Robot Class
Ưu điểm:
- Nó cung cấp quyền kiểm soát các sự kiện Bàn phím cũng như Chuột.
- Nó cung cấp một cách để xử lý một tương tác với hỗ trợ cửa sổ bật lên của Hệ điều hành mà không thể thực hiện được với Selenium Web Driver API.
- Lớp robot đặc biệt hữu ích trong việc quản lý các hành động tải lên / tải xuống tệp bằng cách tương tác với cửa sổ bật lên của hệ điều hành.
- Nó rất dễ sử dụng trong các tập lệnh java Selenium vì lớp này là một phần của gói Java.
Hạn chế:
- Hầu hết các phương thức như mouseMove đều phụ thuộc vào độ phân giải màn hình, do đó, phương pháp này có thể hoạt động khác nhau trên các màn hình khác nhau.
- Lớp này chỉ hoạt động trên cửa sổ trong tiêu điểm , vì vậy hành vi có thể khác nhau khi nhiều cửa sổ mở.
- Khó chuyển đổi giữa các khung hoặc cửa sổ khác nhau với các phương pháp Robot.
Phần này nói gọn hơn Actions Class nhé. Cách sử dụng như sau:
1.Import package: import Robot class
import java.awt.Robot;2. Instantiate: Khai báo
Robot robot = new Robot();3. Invoke method: cú pháp dùng
robot.<required_method>();required_method là các hàm xử lý trong Robot class hỗ trợ: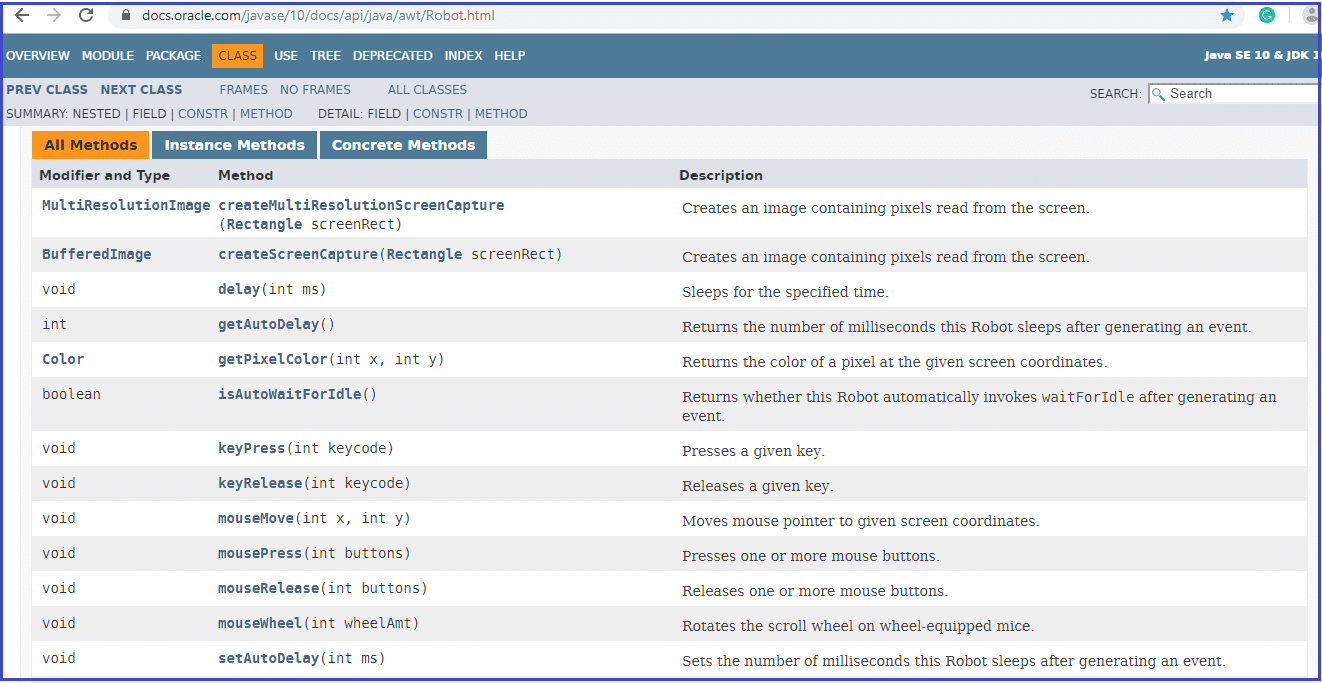
Trong này chúng ta dùng keyPress là nhiều. Nên thôi thử ngay ví dụ nào:
- keyPress là hàm hành động
- keyEvent là hàm để gọi các nút bàn phím
package AnhTester.RobotClass;

import java.awt.AWTException;
import java.awt.Robot;
import java.awt.event.InputEvent;
import java.awt.event.KeyEvent;
import java.util.concurrent.TimeUnit;

import org.openqa.selenium.By;
import org.openqa.selenium.WebDriver;
import org.openqa.selenium.WebElement;
import org.openqa.selenium.chrome.ChromeDriver;
import org.testng.annotations.Test;

public class keyPress {

    @Test
    public static void  InputText() throws InterruptedException, AWTException {
    	System.setProperty("webdriver.chrome.driver", "resources/chromedriver/chromedriver.exe");
		WebDriver driver = new ChromeDriver();
		driver.manage().timeouts().implicitlyWait(10, TimeUnit.SECONDS);
		driver.manage().timeouts().pageLoadTimeout(10, TimeUnit.SECONDS);
		driver.manage().window().maximize();
		driver.get("https://anhtester.com/");

		Thread.sleep(1000);
		WebElement inputCourseElement = driver.findElement(By.name("key"));

		inputCourseElement.click();

        Robot robot = new Robot();
        robot.keyPress(KeyEvent.VK_T);
        robot.keyPress(KeyEvent.VK_E);
        robot.keyPress(KeyEvent.VK_S);
        robot.keyPress(KeyEvent.VK_S);
        robot.keyPress(KeyEvent.VK_T);
        Thread.sleep(1000);
        robot.keyPress(KeyEvent.VK_ENTER);

        Thread.sleep(2000);
		driver.quit();
    }
}
Một số phương pháp thường được sử dụng trong tự động hóa kiểm tra trình duyệt:
Phương pháp bàn phím:
- keyPress (int keycode): Phương thức này nhấn một phím nhất định. Ví dụ, phương thức keyPress (KeyEvent.VK_SHIFT) nhấn phím "SHIFT"
- keyRelease (int keycode): Phương thức này giải phóng một khóa nhất định. Ví dụ, phương thức keyRelease (KeyEvent.VK_SHIFT) giải phóng khóa ”SHIFT”
Phương pháp chuột:
- mousePress (int button): Phương thức này nhấn một hoặc nhiều nút chuột . Ví dụ, phương thức mousePress (InputEvent.BUTTON1_DOWN_MASK) được sử dụng khi nhấp chuột trái vào nút chuột
- mouseRelease (int button): Phương thức này giải phóng một hoặc nhiều nút chuột . Ví dụ, phương thức mouseRelease (InputEvent.BUTTON1_DOWN_MASK) được sử dụng để nhả nút bấm chuột trái
//Chuột giữa là BUTTON2_DOWN_MASK
//Chuột phải là BUTTON3_DOWN_MASK
- mouseMove (int x, int y): Phương thức này di chuyển con trỏ chuột đến tọa độ màn hình đã cho được chỉ định bởi các giá trị x và y . Ví dụ: mouseMove (100, 50) sẽ di chuyển con trỏ chuột đến tọa độ x 100 và tọa độ y 50 trên màn hình.
Bạn có thể tham khảo tài liệu java class Robot để khám phá thêm các phương thức khác.
Ví dụ:
@Test
public void mousePress() throws InterruptedException, AWTException {

    driver.get("https://anhtester.com/");
    Thread.sleep(1000);

    Robot robot = new Robot();
    //Di chuyển trỏ chuột đến vị trí x,y
    robot.mouseMove(1400, 200);
    //Dalay giống sleep
    robot.delay(1000);
    //Click chuột trái
    robot.mousePress(InputEvent.BUTTON1_DOWN_MASK);
    //Thả chuột trái ra
    robot.mouseRelease(InputEvent.BUTTON1_DOWN_MASK);

    Thread.sleep(2000);
}
Ví dụ khác nâng cao hơn xíu: createScreenCapture
@Test
public void createScreenCapture() throws InterruptedException, AWTException, IOException {

    driver.get("https://anhtester.com/");
    Thread.sleep(1000);

    Robot robot = new Robot();

    //Get size screen browser
    Dimension screenSize = Toolkit.getDefaultToolkit().getScreenSize();
    System.out.println(screenSize);
    //Khởi tạo kích thước khung hình với kích cỡ trên
    Rectangle screenRectangle = new Rectangle(screenSize);
    //Tạo hình chụp với độ lớn khung đã tạo trên
    BufferedImage image = robot.createScreenCapture(screenRectangle);
    //Lưu hình vào dạng file với dạng png
    File file = new File("TestImageRobot.png");
    ImageIO.write(image, "png", file);

    Thread.sleep(1000);
} Zalo
Zalo
Anh Tester
facebook.com/anhtester
Đường dẫu khó chân vẫn cần bước đi
Đời dẫu khổ tâm vẫn cần nghĩ thấu