![[Playwright Python] Bài 12 - KẾT HỢP UI + API & CI/CD GITHUB ACTIONS](/uploads/course/website_and_api_testing_automation_with_playwright_python.png)
NỘI DUNG BÀI HỌC
✅ Biết flow chuẩn: Setup data bằng API → test UI → cleanup bằng API
✅ Tổ chức framework tách biệt UI / API rõ ràng
✅ Viết test UI phụ thuộc dữ liệu API (không phụ thuộc môi trường)
✅ Chạy toàn bộ test suite (API + UI) bằng 1 lệnh
✅ Tích hợp CI/CD với GitHub Actions + Report
1. Tại sao phải kết hợp UI + API?
Trong thực tế, nếu bạn chỉ test UI thuần túy, bạn sẽ gặp các vấn đề:
-
Chậm: Phải click từng bước để tạo dữ liệu, login.
-
Thiếu ổn định (Flaky): UI thay đổi hoặc load chậm làm test fail.
-
Khó cleanup: Sau khi tạo dữ liệu test, việc xóa bằng UI rất mất thời gian.
Mô hình Hybrid (Kết hợp):
-
Setup: Gọi API tạo User/Dữ liệu (mất 0.5s).
-
Test UI: Mở trình duyệt vào đúng trang cần test (mất 2s).
-
Cleanup: Gọi API xóa dữ liệu vừa tạo (mất 0.5s).
2. Tổ chức cấu trúc Framework (Refactoring)
Để dự án mở rộng được, chúng ta cần tách biệt các thành phần:
project/
├── apis/               # Chứa các class gọi API (Logic backend)
│   └── posts_api.py
├── pages/              # Chứa các Page Object (Logic UI)
│   └── dashboard_page.py
├── tests/              # Chứa các file test
│   ├── api/
│   └── ui/
│       └── test_post_lifecycle.py
├── conftest.py         # Chứa Fixtures dùng chung
├── .github/
│   └── workflows/
│       └── playwright.yml # Cấu hình CI/CD
└── requirements.txt
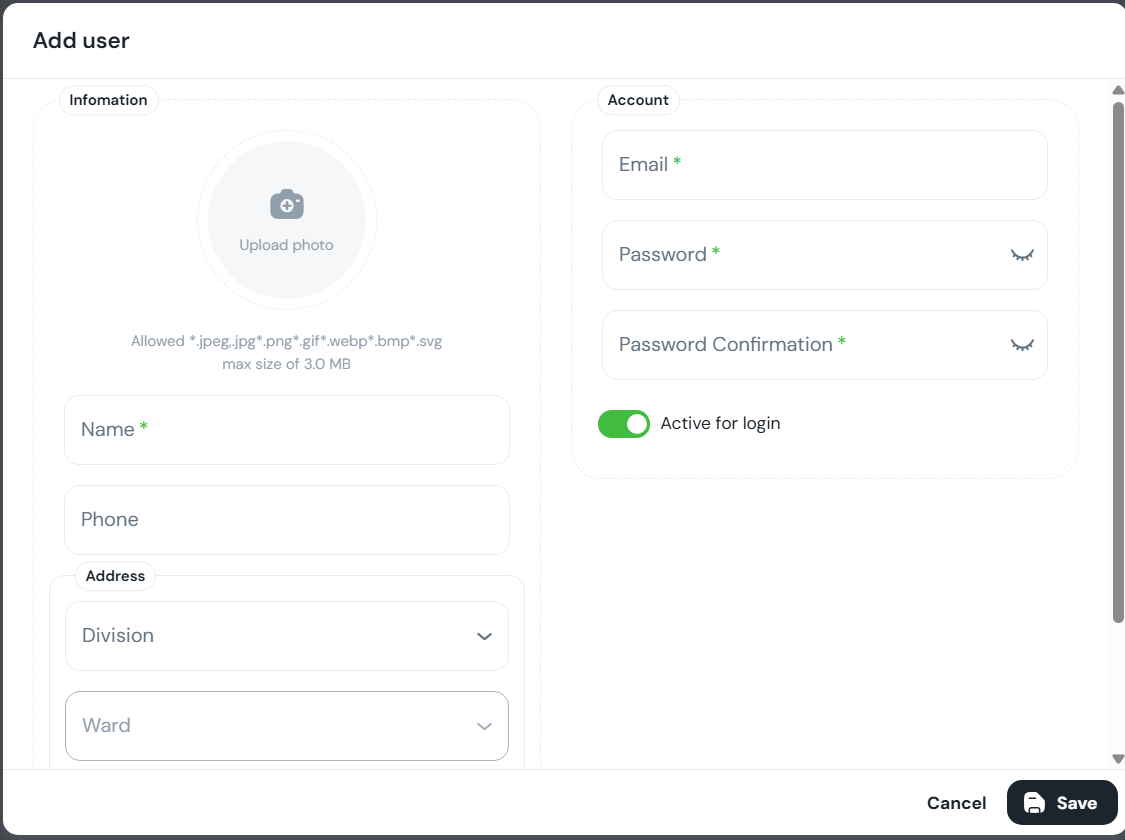
3. Thực hành: Setup dữ liệu qua API cho UI Test
Giả sử ta test chức năng: Add User trên UI. Thay vì điền form tạo bài viết bằng UI, ta tạo bằng API.
Bước 1: Tạo Fixture: APIRequestContext + random account
import pytest
import random
import string
from playwright.sync_api import sync_playwright

def random_email():
    suffix = "".join(random.choices(string.ascii_lowercase + string.digits, k=8))
    return f"lanqa_{suffix}@mailinator.com"

def random_password():
    return "Test@123456"  # demo; có thể đổi theo rule của hệ thống

@pytest.fixture(scope="session")
def api_context():
    with sync_playwright() as p:
        ctx = p.request.new_context(
            base_url="https://book.anhtester.com",
            extra_http_headers={
                "Accept": "application/json",
                "Content-Type": "application/json",
            },
        )
        yield ctx
        ctx.dispose()

@pytest.fixture
def new_user_data():
    return {
        "email": random_email(),
        "name": "LanHa",
        "password": random_password(),
        "phone": "0900000000",
        "address": "HCM",
        "avatarUrl": ""
    }
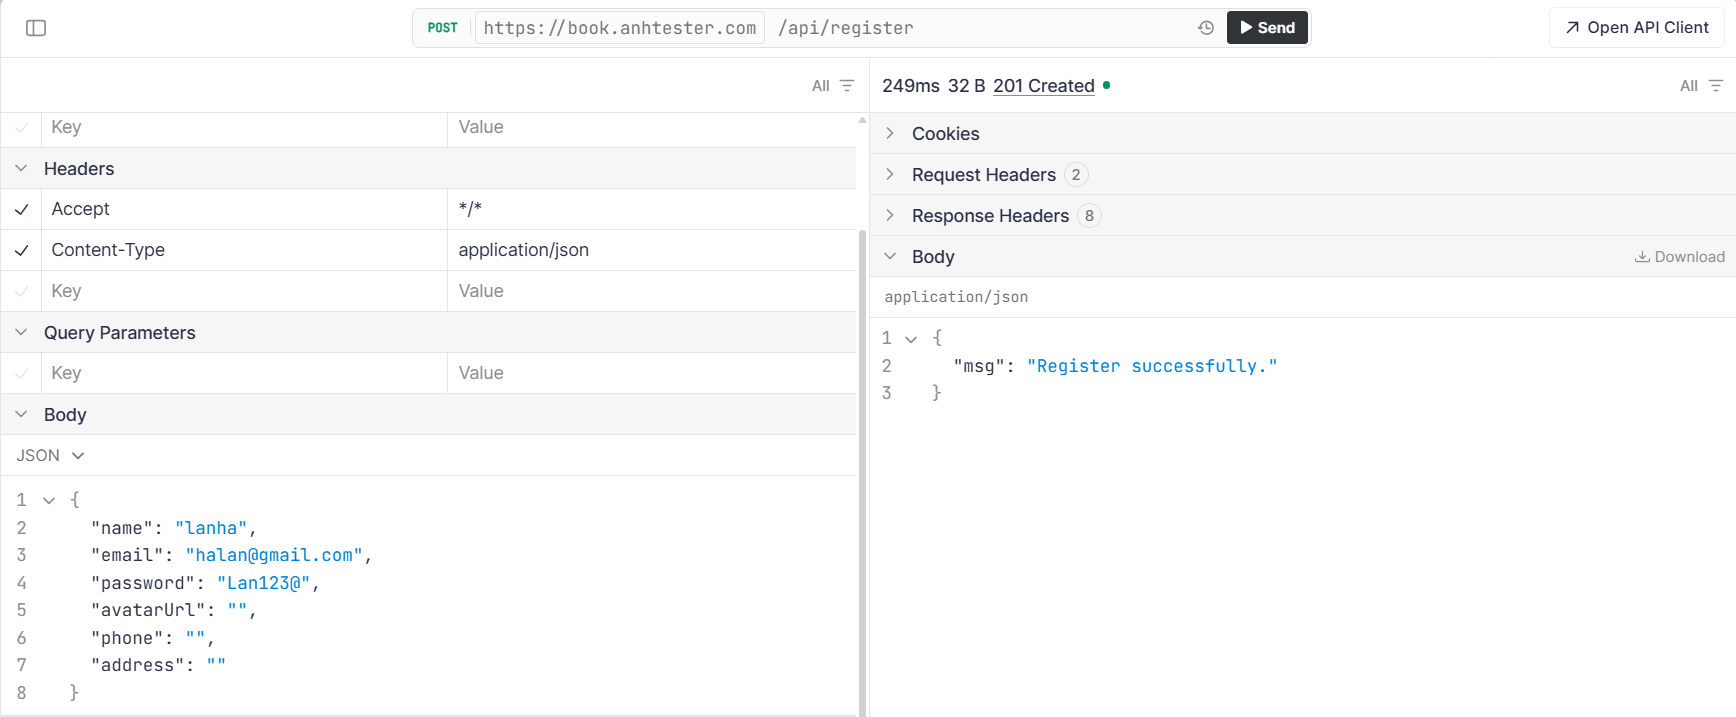
Bước 2: Helper: gọi API register (có “fallback” nếu backend yêu cầu bọc fields)
Có hệ thống (như Strapi/custom) sẽ bắt payload dạng {"fields": {...}}.
Swagger của bạn nhìn giống body phẳng, nhưng để chắc ăn mình làm 2 bước: gửi phẳng trước, fail thì gửi bọc fields.
api/auth_api.py
def register_user(api_context, payload: dict):
    # Try 1: body phẳng như swagger
    res = api_context.post("/api/register", data=payload)
    if res.ok:
        return res.json()

    # Try 2: fallback - bọc "fields" (nếu backend yêu cầu schema kiểu này)
    res2 = api_context.post("/api/register", data={"fields": payload})
    if res2.ok:
        return res2.json()

    raise AssertionError(
        f"Register failed.\n"
        f"Try1: {res.status} - {res.text()}\n"
        f"Try2: {res2.status} - {res2.text()}"
    )
Bước 3: Page Object UI: Login page
class LoginPage:
    EMAIL_INPUT = 'input[placeholder="Email address *"]'
    PASSWORD_INPUT = 'input[placeholder="Password *"]'
    LOGIN_BUTTON = 'button:has-text("Login account")'

    def __init__(self, page):
        self.page = page

    def open(self):
        self.page.goto("https://book.anhtester.com/sign-in")

    def login(self, email: str, password: str):
        self.page.fill(self.EMAIL_INPUT, email)
        self.page.fill(self.PASSWORD_INPUT, password)
        self.page.click(self.LOGIN_BUTTON)
Bước 4: Viết Test kết hợp UI + API (tests/ui/test_posts.py)
from api.auth_api import register_user
from pages.login_page import LoginPage

def test_register_by_api_then_login_ui(api_context, page, new_user_data):
    # 1) API: Register
    register_res = register_user(api_context, new_user_data)

    # assert tối thiểu (tuỳ response thực tế)
    assert register_res is not None

    # 2) UI: Login bằng account vừa tạo
    login = LoginPage(page)
    login.open()
    login.login(new_user_data["email"], new_user_data["password"])

    # Verify login successfully
    # User -> search user vừa tạo
4. Tăng tốc Login bằng storage_state
Thay vì bài test nào cũng điền Username/Password, ta login 1 lần bằng API và lưu lại "trạng thái" (Cookies/Token).
Tại conftest.py:
@pytest.fixture(scope="session")
def login_and_save_state(browser):
    context = browser.new_context()
    page = context.new_page()

    # Thực hiện login qua API hoặc UI một lần duy nhất
    page.goto("https://example.com/login")
    page.fill("#user", "admin")
    page.fill("#pass", "123456")
    page.click("#login-btn")

    # Lưu trạng thái vào file JSON
    context.storage_state(path="auth.json")
    yield "auth.json"
    context.close()

@pytest.fixture
def logged_in_page(browser, login_and_save_state):
    # Tạo context mới từ file auth.json đã có session
    context = browser.new_context(storage_state=login_and_save_state)
    page = context.new_page()
    yield page
    context.close()
5. Cấu hình CI/CD với GitHub Actions
5.1 ) Từng bước tạo YAML file
Cách 1: Tạo ngay trong GitHub UI
-
Vào repo trên GitHub
-
Tab Actions
-
GitHub gợi ý workflow → chọn set up a workflow yourself
-
Đặt tên file:
playwright.yml -
Paste nội dung YAML
-
Commit trực tiếp lên branch (main hoặc branch mới)
Cách 2: Tạo trong local (khuyến khích khi làm dự án)
-
Trong project local, tạo thư mục:
mkdir -p .github/workflows
-
Tạo file:
touch .github/workflows/playwright.yml
-
Dán YAML vào file
name: Playwright Tests

on:
  push:
    branches: [ "main" ]
  pull_request:
    branches: [ "main" ]


jobs:
  test:
    runs-on: ubuntu-latest

    steps:
      - uses: actions/checkout@v4

      - name: Set up Python
        uses: actions/setup-python@v5
        with:
          python-version: "3.11"

      - name: Install dependencies
        run: |
          pip install -r requirements.txt
          playwright install --with-deps

      - name: Run tests
        run: pytest -q --html=report.html --self-contained-html

      - name: Upload report
        if: always()
        uses: actions/upload-artifact@v4
        with:
          name: playwright-report
          path: report.html
File ghi chú:name: Playwright Tests # ❌ Không bắt buộc – chỉ để hiển thị tên workflow trên GitHub Actions (NÊN CÓ) on: # ✅ BẮT BUỘC – khai báo khi nào workflow được chạy push: # ❌ Không bắt buộc – chạy khi push code branches: [ "main" ] # ❌ Không bắt buộc – chỉ chạy khi push lên branch main pull_request: # ❌ Không bắt buộc – chạy khi tạo / update Pull Request branches: [ "main" ] # ❌ Không bắt buộc – chỉ áp dụng cho PR vào main jobs: # ✅ BẮT BUỘC – workflow phải có ít nhất 1 job test: # ❌ Không bắt buộc – tên job (đặt gì cũng được) runs-on: ubuntu-latest # ✅ BẮT BUỘC – máy runner dùng để chạy CI (Linux) steps: # ✅ BẮT BUỘC – danh sách các bước thực thi trong job - uses: actions/checkout@v4 # ✅ GẦN NHƯ BẮT BUỘC – checkout source code từ repo về runner # Không có step này thì runner không có code để chạy test - name: Set up Python # ❌ Không bắt buộc – chỉ để mô tả step uses: actions/setup-python@v5 # ❌ Không bắt buộc về mặt cú pháp, nhưng BẮT BUỘC về mặt thực tế cho Python project with: python-version: "3.11" # ❌ Không bắt buộc – nhưng NÊN CÓ để fix version Python, tránh lỗi môi trường - name: Install dependencies # ❌ Không bắt buộc – chỉ là tên step run: | # ✅ BẮT BUỘC (vì cần cài thư viện để chạy test) pip install -r requirements.txt # Cài pytest, playwright, pytest-html... playwright install --with-deps # Cài browser (Chromium/Firefox/WebKit) + dependency cho Linux runner - name: Run tests # ❌ Không bắt buộc – tên step run: pytest -q --html=report.html --self-contained-html # ✅ BẮT BUỘC – step chính để chạy automation test # -q: giảm log # --html: tạo report HTML # --self-contained-html: report 1 file duy nhất - name: Upload report # ❌ Không bắt buộc – tên step if: always() # ❌ Không bắt buộc – nhưng RẤT NÊN CÓ # always(): dù test PASS hay FAIL vẫn upload report uses: actions/upload-artifact@v4 # ❌ Không bắt buộc – dùng để upload file (report, screenshot, video...) with: name: playwright-report # ❌ Không bắt buộc – tên artifact hiển thị trên GitHub path: report.html # ❌ Không bắt buộc – file/folder cần upload -
Commit + push:
5.2) Push lên như thế nào? (từng lệnh)
git status
git add .github/workflows/playwright.yml
git commit -m "Add GitHub Actions CI for Playwright tests"
git push origin main
Nếu bạn đang làm trên branch:
git checkout -b ci/playwright
git add .github/workflows/playwright.yml
git commit -m "Add CI workflow"
git push origin ci/playwright
→ rồi lên GitHub tạo Pull Request.
5.3) Kiểm tra workflow đã chạy chưa
-
Vào repo GitHub → tab Actions
-
Chọn workflow “Playwright Tests”
-
Click vào run gần nhất → xem log từng step
-
Nếu có upload artifact → tải
report.htmlvề xem
6. Best Practices cho CI/CD
-
Headless Mode: Luôn chạy ở chế độ không giao diện (
headless=True) trên CI để tiết kiệm tài nguyên. -
Environment Variables: Không để Password/Token trong code. Dùng
GitHub Secretsvà đọc quaos.environ. -
Artifacts: Luôn upload screenshot/video/html report khi test fail để dễ debug trên GitHub.
